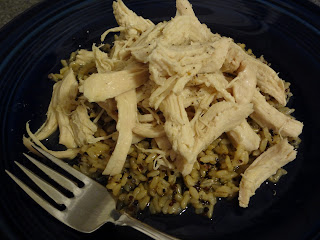
Tuesday, December 27, 2011

Santa Fe Stew


A deliciously filling, warm meal for a cold winter night, Santa Fe stew is my mom's recipe. Apparently, she bought it for 25 cents at a Christmas festival before I was born, so it's fitting to post it just a few days after Christmas. It's a one-pot wonder, and the beans have enough protein that it could be served vegetarian/vegan with some extra vegetables.

I have a lot of memories of warming up over this meal. One time, a cousin served us this stew, was surprised that we knew it. I have edited this recipe a lot, but I have a lot of respect for the original recipe I grew up with, which I managed to find online here (although my original says stewed tomatoes, not diced, and has no turkey option).

I use extra-lean ground turkey and make my own seasoning blends. I also have recently started swapping out the canned beans for dried and buy jarred tomato paste, both because of BPA in canned foods, but I know soaking is a pain, so you can find a list of canned goods that are BPA-free here. To supplement the tomato paste, I added water, and since Tessa doesn't like corn, I use green beans, carrots, or whatever I happen to have on hand instead.

1 lb. extra lean ground turkey
1 medium onion, chopped (optional)
1 package taco seasoning mix (or make your own, but add slowly, taste, and re-season!)
1 package ranch dressing mix (or make your own)
3 cups black, pinto, and/or kidney beans, soaked and drained (1 cup dry, or 3 15-oz. cans)
1 8 oz. jar tomato paste
1 1/2 cups water, (you may need more)
1 cup corn or vegetable of your choice

1. Brown the meat and onion together in a dutch oven, then drain away excess grease.
2. Add the two dry seasoning mixes and stir until mixed thoroughly. 
3. Add all other ingredients, stir, cover, and simmer for 30 minutes or until beans are tender.
4. Optional: garnish with hand-grated cheddar cheese or tortilla chips.

Serves six.

Waaaarm.

Tuesday, December 20, 2011

Homemade Pizza


I love pizza. But I'll admit it. I thought I didn't have time to make my own pizza dough, especially a tasty whole wheat dough. Then I saw this video by Fabio (from Top Chef, not romance novels), and I had to try it for myself, especially because we were getting tired of frozen and (expensive!) delivery pizza. (Plus, it's the best crust for breakfast pizza!)

What takes the most time is actually letting the dough rise, but it's just wait time, so you can watch an episode of 30 Rock or walk the dog or whatever you need to do while it rises. I modified the crust to include whole wheat flour for the health benefits, although some all-purpose is necessary to keep the crust from petrifying.

The first time I made it, I used all of the dough to make a single crust, but the pizza came out way too bread-like. The second time, I split the dough into two balls before letting it rise, and had the perfect amount to make two large pizzas. Fabio says to make it in a mixer with a hook attachment, but since I have no such luxury, I used a spatula to mix and then my hands to knead the dough.

1 packet (or ¼ oz.) dry active yeast
1 ½ cups water, warm but not hot
1 tsp. sugar
2 cups whole wheat pastry flour (plus a few pinches for dusting)
2 cups all purpose flour
1 tbsp. extra virgin olive oil
Toppings:
16 oz. can whole plum canned tomatoes or 8 oz. can tomato paste
1 cup fresh mozzarella 
3-6 fresh mushrooms, sliced
3-4 fresh or canned artichoke hearts
1 clove garlic, chopped
10-12 fresh basil leaves
Drizzle of extra virgin olive oil
1/2 tsp coarse sea salt
sprinkling of onion powder and/or oregano (optional)

1. In a stand mixer with the hook attachment (or a large bowl with some elbow grease), mix the yeast, water and sugar.
2. Add the flour in small amounts, mixing well between each addition.
3. When the dough is mixed well and not too sticky use a little oil to help remove it from the bowl. Form it into two balls, and place each on a lightly floured surface (I left one in the bowl) and cover with a dry towel. Let the dough rise for 30 minutes.
4. After the dough has rested, use one ball per pizza. I like to freeze one, then thaw and use it later. Transfer the ball of dough to a sheet tray or pizza stone, and use your hands to shape the dough (no rolling pin necessary).
5. Top with tomatoes crushed by hand, chunks of fresh mozzarella, basil leaves, mushrooms, artichoke hearts, and sea salt. Drizzle with extra virgin olive oil.
6. Bake in a 400-degree oven until the crust around the edge is golden brown, about 20 minutes.

Serves two to three.

Your kittens may be sad at first...
...But don't worry; they'll find new box hangouts in no time.

Tuesday, December 13, 2011

Whole Wheat Pita Chips


Last week, I made Greek-style garden chicken pitas for dinner. This week, I found myself with leftover whole wheat pita bread and a craving for chips and salsa. So, I toasted up the bread with some spices, and the result was infinitely better than store-bought pita chips, and healthier, too. I also found that, as with most food, I enjoyed them more after having taken the time (read: 10 minutes) to make them myself.

3 whole wheat pita rounds
1 tbsp extra virgin olive oil (optional)
1/8 tbsp sea salt
1/8 tbsp garlic powder, or spice of your choice
fresh black pepper

1. Preheat the oven to 400 degrees.
2. Slice each pita round into eighths, making sure to pull apart the front and back so each piece looks like a slice of pizza.
3. Mix the oil and spices in a small bowl. Brush each piece of pita with the mixture. (If you're not using the oil, simply sprinkle the spices on, but you may need to use more, and they won't brown as noticeably.)
4. Bake for 6-10 minutes, watching to make sure they don't burn.

Serves three plain or with your favorite dip or spread. (Try them with Aunt Judi's hummus!)

You know the way to my heart.

Tuesday, December 6, 2011

Chocolate Pumpkin Loaf


I came across this recipe when searching for fall seasonal recipes, and found this one here. It's vegan, which is awesome, has pumpkin, with Tessa loves, and chocolate, which I love. I might like to try it sometime with walnuts in addition to the chocolate chips.

I did make a few minor changes. I made it with whole wheat flour, and instead of measuring out each one of the four spices (ground cinnamon, nutmeg, ginger, and clove), I just used 1 1/8 teaspoons of pumpkin spice mix. I also used a 9" loaf pan, so I adjusted the bake time and it worked flawlessly. I have not tested the 8" loaf pan bake time. 

1/4 cup organic applesauce
2 tablespoons canola or coconut oil
1/3 cup unsweetened cocoa powder
1/3 cup + 2 tablespoons boiling water, divided (see note)
1 cup pumpkin puree
1 cup sugar
1 teaspoon vanilla extract
1 1/2 cups whole wheat pastry flour
1/2 teaspoon ground cinnamon
1/4 teaspoon ground nutmeg
1/4 teaspoon ground ginger
1/8 teaspoon ground cloves
3/4 teaspoon baking soda
3/4 teaspoon salt
1/2 cup chocolate chips

1. Preheat oven to 350 degrees and lightly grease an 8- or 9-inch loaf pan. Set some water on to boil, but don't measure yet.
2. Put the applesauce, oil, and cocoa powder in a mixing bowl. In a separate bowl, sift together the flour, spices, baking soda, and salt.
3. Measure out 1/3 cup from the boiling water and pour it into the bowl with the chocolate mixture, mixing quickly to make a smooth chocolate sauce. Add the pumpkin, sugar, and vanilla and mix well.
4. Dump about half of the flour mixture into the chocolate mixture and gently stir to incorporate, then measure out 1 tablespoon of boiling water and stir again. Then, add the remaining flour mixture and another tablespoon of boiling water and stir just until smooth. Be careful not to overmix. Fold in the chocolate chips.
5. Spoon the batter into the prepared loaf pan. It will be good and thick. Smooth the top out with a spatula.
6. If you're using an 8-inch loaf pan, bake for 55 minutes to an hour. For a 9-inch loaf pan, bake for 45-50 minutes. Stick a steak knife into the center of the loaf to check for doneness. A little bit of wetness is okay since it could be from a chocolate chip, but the knife should come out mostly dry.
7. Allow the loaf to cool for 10 minutes, then invert pan and place loaf on a cooling rack to cool most of the way.
8. Slice and serve a little bit warm, or thoroughly cooled.

Makes about 10 servings.

I can haz two slices?

Tuesday, November 29, 2011

Vegetarian Bubble and Squeak


Bubble and squeak is traditionally made from leftovers and served as part of an English breakfast. We first encountered a vegetarian version of it at Jonathon's in Dallas. Tessa was craving it this week, so I dug around and found this recipe.

The result is my version of vegetarian bubble and squeak, made fresh instead of from leftovers, but it will be even easier to make when I have extra mashed potatoes. I'm calling this a "healthy alternative," because traditional bubble and squeak is fried in lard, and because I swapped out the veggies, using dandelion greens instead of cabbage, because they are incredibly nutritious. I also subbed in leek for onion, because they add a certain creaminess I'm completely addicted to.

The whole thing, in fact, was creamy and filling, even after I replaced some of the butter with extra virgin olive oil for a heart-healthier dish. If you do want to make it more of the traditional breakfast, or just want to add a protein, try serving with a fresh egg or (if you're a meat-eater) a piece of spicy turkey sausage.

6 fist-sized Yukon Gold potatoes
1 leek, cleaned and chopped
1 medium clove of garlic, peeled and chopped
1 bunch of dandelion greens, chopped
4 tbsp butter, divided (I substituted 1 tbsp with extra virgin olive oil)
Salt and freshly-ground black pepper
1/4 cup milk

1. Boil and mash the potatoes with the milk and half of the butter, then season with sea salt, fresh cracked pepper, plus a touch of ground nutmeg.
2. Melt the rest of the butter in a wide and deep frying pan over a low heat and saute the leeks until they are soft but not brown.
3. Add the chopped garlic and cook for an additional minute. Then mix in the chopped greens, and cook, stirring frequently, for 2-3 minutes.
4. Stir in the mashed potatoes and mix everything together. Taste, and season with salt and pepper, if necessary.
5. Cook the mixture for about 5 minutes, stirring occasionally, until heated through.

Serves three to four.

Bubbles! Bubbles! My bubbles!

Tuesday, November 22, 2011

Vegetable and Three Cheese Stuffed Shells


Tessa is getting really good at finding recipes she wants me to make for dinner. (Original recipe here.) This one I thought might have a similar taste profile to my favorite lasagna recipe. However, it has its own unique flavor. I served it with a mixed green salad dressed with a homemade balsamic vinaigrette, feta crumbles, and chopped walnuts.

It's also chock full of veggies (and cheesy goodness), which I like, and was pretty quick to make (30 minutes start to finish). My only regret is that I couldn't find whole wheat jumbo shells, so I had to settle for regular ones.

16 jumbo shells (from a 12-oz box, and whole wheat, if you can find them)
2 cups marinara sauce
2 handfuls of fresh, organic spinach
2 cups organic broccoli florets
1 15-oz container of part-skim ricotta
1/2 cup Parmesan cheese, grated
1 cup part-skim mozzarella, shredded
1/4 tsp garlic powder
sea salt and fresh ground black pepper

1. Preheat oven to 400°F.
2. Cook the pasta 1 minute less than package directions (it will finish cooking in the oven). Drain and leave in a colander to cool. Do not rinse.
3. Spread the sauce onto the bottom of a large broiler-proof baking dish.
4. Finely chop the spinach and broccoli and place in a large bowl. Stir in the ricotta, Parmesan, 1/2 of the mozzarella, the garlic powder, and about 1/4 tsp each salt and pepper.
5. Spoon the mixture into the shells (about 1/4 cup each) and place on top of the sauce. Sprinkle with the remaining 1/2 cup mozzarella and bake until the shells are heated through, 10 to 12 minutes. 
6. Increase heat to broil. Broil the shells until the cheese begins to brown, 2 to 3 minutes.
Serves four to five.

Wait. You... eat...?

Tuesday, November 15, 2011

Easy Homemade Cheese Crackers


Tessa directed me to this excellent "real" food blog recently, and the recipe that intrigued me most was one for homemade cheese crackers. I get hungry very frequently, so I snack a lot. Nine times out of ten, I'm a salty snack craver, so I rummage for chips and salsa, hummus, nuts, etc., and this seemed like a much less processed way to get my cheesy-salty-crunchy fix.

They actually came out looking a little like butter cookies, but they tasted exactly like Cheese Nips. It's amazing. And they only have three ingredients. For my cheese, I used Seaside English Cheddar, and the crackers are delightful.

I'm reproducing the Leake family's recipe below, with a couple quick notes, because it was so fantastic and conscientious already that there wasn't much I wanted to change. There is a large amount of butter in them; however, they're the kind of snack you can eat four or five of and feel sated, so I don't see it as a problem, at least not for us. (To give you some perspective, a box of organic cheese crackers lasts about three days in our house. The single batch of crackers I made have been around for three full days already, and half of them are still sitting in an airtight tupperware container.)

1 cup whole wheat pastry flour
5 tbsp cold butter, cut into tablespoon-sized chunks
4 oz. of cheddar cheese, hand shredded or finely chopped

1. Preheat oven to 350 degrees.
2. Combine all three ingredients in a food processor and blend. The mixture will eventually turn into one big ball chasing itself around the bowl.* Be patient because it can take a few minutes.
3. Roll the ball into a log about 1 ½” in diameter. At this point you could refrigerate the dough until later.
4. With a sharp knife or waxed dental floss slice ¼” thick pieces off the log and place each one flat on an ungreased baking sheet. Try to rotate which side you are cutting down on because the top of the log does start to flatten a little. It is like your very own homemade slice and bake!
5. If you want your crackers to look a little fancy take a fork and gently mash down the top of each one before baking.
6. Bake for 12 – 14 minutes** or until golden brown.

*I have a three cup food processor, so my mixture did not become a ball or chase itself, because it wasn't physically possible. I just watched until the ingredients seemed to be uniformly mixed, then I scooped it all out onto my cutting board and rolled it into a log.

**I ended up baking mine for 20, even though my oven usually runs hot, to achieve a more cracker-like crunch on the bottom. They were not burned.

Serves six (4 crackers each).

Om nom nom

Tuesday, November 8, 2011

Turkey Shepherd's Pie


Shepherd's Pie (of the ground beef/potato/cheese variety) was a staple dinner in my family growing up. Apparently when I was in pre-school, the chef there made it and I fell in love so deeply that my mom acquired the recipe from my school.

Since I have been recently cutting red meat and pork out of my diet, and have not cooked with them since I began cooking for Tessa, I've been looking for a tasty alternative using some sort of poultry. I found it.

This recipe originated from an allrecipes.com post, but I overhauled it significantly, and it was a satisfying, delicious dinner. I used ground turkey because is significantly more heart-healthy than ground beef (though ground or shredded chicken would also work well), made a gravy for the turkey that closely resembles my pot pie filling, adjusted the spices and veggies to suit me, and poof! Deliciousness.

On a dish-y note, I boiled the potatoes, browned the meat, and made the gravy all in the same 3-quart sauce pan because I don't like dish duty. For those who eat with their eyes, yes, it is a little monotone, but trust me, the flavors are dynamic.

7-8 fist-sized Yukon Gold potatoes
6 tbsp butter, divided
1 cup milk, divided
1 medium head garlic
1 tsp extra virgin olive oil
1/4 cup whole wheat pastry flour
1 cup chicken stock or broth
1 pound ground turkey
sea salt and freshly ground black pepper, to taste
1/2 tsp dried thyme (1 tbsp fresh, chopped)
1/2 tsp rosemary (1 tbsp fresh, chopped)
1 bell pepper, diced
1 leek, cleaned and chopped
1 cup Cheddar cheese, hand shredded

1. Cut the head of garlic in half and drizzle it with olive oil. Wrap in foil and bake at 400 degrees for 45 minutes.
2. Reduce oven temperature to 350 degrees (you may want to save this for later).
3. Chop the potatoes into 1 inch chunks and boil them until tender. Drain, then mash potatoes. Add 4 tbsp of the butter, 2/3 cup of the milk, roasted garlic, salt, and pepper, and mix in. Set aside.
4. Brown the turkey in a little olive oil, and set aside. 
5. Melt the remaining 2 tbsp butter in a sauce pan over medium heat and add the leek and bell pepper. Season with salt and pepper. Saute for about 2 minutes, then whisk in the flour. Remove from heat and add remaining 1/3 cup milk and the chicken stock or broth. Return to heat, stirring constantly until mixture reaches the boiling point. Remove from heat and add the turkey, rosemary, and thyme. 
6. Pour the turkey mixture into the bottom of a casserole dish, distributing evenly. Spread the mashed potatoes on top, then sprinkle with the cheddar cheese.
7. Bake at 350 degrees for 25 minutes or until sauce begins to bubble up around the edges.

Serves six.

I herded this sheep for you. 

Tuesday, November 1, 2011

Stuffed Acorn Squash

This recipe was inspired by one of Tessa's favorite dishes from the Dream Cafe in Dallas, unfortunately no longer on their menu because they changed chefs. The other day, Tessa asked me to make something like it, and so I did.

I got as close as I could, and she said, had I used a difference cheese (parmesan was all I had-- I recommend goat cheese or feta), it would have been better than the Dream Cafe's. Quite a compliment! It takes some time to cook, but most of it is just baking time, and trust me, it's worth it. It's also quite filling (as a complete meal), acorn squash is in season, and, in honor of Halloween, shaped like a pumpkin! You can swap out the veggies if you'd prefer something else; I just used, again, what I had on hand. Plus, if you omit the cheese, it's vegan.

2 whole acorn squash
2 cups cooked whole grain brown rice
1/4 cup chopped carrot
1/4 cup peas (or vegetable of your choice)
1/4 cup toasted walnuts, chopped
1/4 cup dried cranberries
1/8 cup goat cheese crumbles
1 tbsp extra virgin olive oil
1 tsp chopped sage
1/8 tsp garlic
sea salt and fresh cracked black pepper
1 cup broth or stock, divided

1. Cut off the top inch of each acorn squash. Keep the top, but scoop out and discard the seeds. If the squash won't stand up on its own, cut off a piece from the bottom to flatten it. Set the squash, including the top, aside, on a baking sheet.
2. Heat the olive oil in a pan over medium heat. Add the vegetables and spices, and saute until the begin to soften. At this point, mix in the cooked rice, then add 3/4 cup of the stock/broth a little at a time, so that the rice absorbs it.
3. Preheat the oven to 400 degrees.
4. Once all but a few teaspoons of the stock has been incorporated, stir in the walnuts, cranberries, and parmesan. Remove from heat, and spoon into each squash. Place the tops back on the squash, and the remaining rice mixture in an oven-safe dish.
5. Bake the squash for 1 hour. When 20 minutes remain, pour the remaining stock/broth over the leftover rice mixture, cover, and put it in the oven with the squash.

Serves two.

Happy Halloween!

Tuesday, October 25, 2011

Chicken Sausage, Potato, and Apple Hash


My dad devoutly opposes my usage of the word hash, which to him means shredded beef, potato, and onion browned in a skillet, but which Merriam-Webster defines as "chopped food; specifically: chopped meat mixed with potatoes and browned." So for this recipe I'm using the term loosely, since I'm not chopping the meat, but still. I think it applies.

I was originally inspired by this recipe, but decided I wanted to modify it to make it a full meal. Because Tessa and I have watched approximately one zillion episodes of "Chopped," and I already love hash, I decided to add roasted potato and deepen the flavors with a little thyme and garlic. I also healthed it up with chicken sausage instead of pork links, and subbed in leeks for onions, because I am leek-crazy.

This recipe only takes around 30 minutes (since you can prep everything else while the potatoes are roasting) and is full of beautiful fall flavors, and uses some of those fresh seasonal apples that are flooding farmers' markets and grocery stores around this time. I associate sage with Thanksgiving, and roasted potatoes and leeks are just melt-in-your-mouth comfort food.

I left the sausages whole to ensure that they didn't dry out, and started cooking them first to get a nice caramelization on them. Don't forget to take your sausages' flavorings into account in terms of seasoning. If you have a choice, choose one with a bit of heat; it'll nicely offset the sweetness of the apples. If you're a vegetarian, you could sub in veggie dogs or perhaps some tempeh for the chicken sausage.

1 package pre-cooked chicken sausages
3 yukon gold potatoes
1 large or 2 small leeks, cleaned and cut into half moons
3 small apples, cored and sliced or chunked
3 tbsp extra virgin olive oil
1 tbsp butter
1 tsp dried sage
1/8 tsp garlic powder
1/4 tsp thyme
sea salt and fresh cracked black pepper, to taste

1. Cut the potatoes into chunks and toss to coat with 1 tbsp of the olive oil and the spices. Roast in a 400-degree oven for 15 minutes. (Sound familiar? It's this with different spices.) Remove and set aside.
2. Melt the butter in the remaining olive oil in a large cast iron skillet over medium heat. Add the whole sausages and cook for 5-6 minutes, turning occasionally to ensure even browning.
3. Stir in the leeks, apples, and roasted potatoes. Cook until leeks and apples are tender and sausages are nicely browned, about 5-10 minutes, stirring occasionally and continuing to turn the sausages.

Serves four.

Carefully remove all kittens from skillet before cooking. 

Tuesday, October 18, 2011

Butternut Squash Risotto


This was my maiden voyage making risotto, a food I'm actually not as familiar with as I'd like to be. The recipe, apparently originally by Gordon Ramsey, Tessa got from a tweet by her friend Christina (@t0astbandit) and emailed to me so that I would make it. We both love butternut squash, so I gave it a whirl. I also found the most perfect local butternut squash I have ever seen. It was beautiful.

I usually post recipes with fairly quick/easy preparations, but this one is a little more complex. It took me about an hour and a half, start to finish, although about half of that time all I was doing was roasting the squash and prepping the rice.

It turned out lovely, though-- on the sweet side but still savory, nicely spiced, bright, complex flavor. It was also filling-- really stuck to my ribs-- and the cheese added a touch of richness that filled it out perfectly. Tessa will tell you, I was still remarking on the flavor of dinner two hours after we were done eating it. The only thing I would modify is that I would add the lemon juice more slowly, mixing and tasting as I go-- the batch I made yesterday was a tiny bit too lemony.

I've made two modifications to the recipe-- it calls for shallots, I used leeks instead, and I used whole grain brown rice as my base. The brown rice is for nutrition; the leeks are because I love them. Definitely a good fall dish. Vegetarian, too.

3 cups vegetable or chicken stock/broth.
1 1/4 cups whole grain brown rice
3 tbsp extra virgin olive oil
1 large leek, finely chopped (or 2 shallots)
1 butternut squash
1 bunch of thyme sprigs
4 tbsp butter
1 cup dry white wine
2 tbsp mascarpone cheese
4-5 tbsp freshly grated Parmesan cheese
Freshly ground sea salt and black pepper
12 sage leaves, finely sliced
Juice of 1 lemon

1. Preheat the oven to 400 degrees. Cut the squash in half lengthwise and scoop out the seeds. Lay it on a baking tray, drizzle with olive oil, and season with salt and pepper. Arrange the thyme springs evenly on top and place in the oven. 
2. Roast for about 45 minutes, until they are fully cooked, soft so that a knife can easily go through the squash. If they start to colour too much, cover with aluminum foil and return to oven. 
3. Once the squash is cooked, it remove from the oven set aside and allow to cool. Scoop out the baked flesh of the butternut squash, discarding the skins, and puree. (I used a hand mixer to puree since I'd made smoothies in the food processor-- this worked fine and the puree was still velvety.)
4. Pour 1 cup chicken or vegetable stock/broth in a saucepan and bring to the boil. Add the rice, return the stock to the boil and cook for 4 minutes, adding more broth/stock if necessary so that the rice is covered. Drain well.
5. In a medium saucepan, gently sauté the leeks/shallots in the remaining olive oil until soft. Add the wine, and cook until the alcohol has evaporated and the liquid has almost completely reduced. 
6. Heat the remaining stock to the boiling point. Add the rice to the shallots, then begin to add the stock, a ladleful at a time, making sure that each addition has been absorbed before adding any more. Continue until the rice grains are tender.
7. Add the cold butter, then quickly stir in the butternut squash puree and allow to heat through. Then turn off the heat and add the parmesan, mascarpone, chopped sage and lemon. (Be careful with the lemon-- as I said above, mine came out a little overpowering.) Stir until all the dairy is incorporated, so that the risotto is creamy. If it becomes too dry, add a spoon or two of water, and adjust the seasoning. 

Serves four, topped with fresh-shaved Parmesan.

Gordon Ramsay Kitten says: "Shut it down!"

Tuesday, October 11, 2011

Roasted Potatoes


I've been on a roasting kick lately, mostly because our local farmers' markets have been supplying us with lots of fresh, local produce and roasting is a super easy cooking method that can be extremely flavorful. I love roasting squash, both summer and butternut, and one of my new standbys is roasted potatoes.

When selecting your potatoes, the smaller the better, since smaller potatoes have a higher skin-to-flesh ratio, and the skin is where the majority of the nutrients can be found. Also, colored-flesh potatoes like Yukon Gold or Purple Viking are a better choice than potatoes with white flesh, because they contain extra nutrients in the actual flesh of the potato. So choose wisely. I served these potatoes last night with some spinach and garlic chicken sausage and fresh green beans, both from the farmer's market (as were the potatoes).

1 lb small potatoes
1 tbsp extra virgin olive oil
1/8 to 1/4 tsp garlic powder
1/8 tsp oregano
1/8 tsp basil
1/8 tsp thyme
pinch of nutmeg
cayenne pepper, to taste
sea salt and freshly ground black pepper, to taste

1. Preheat oven to 400 degrees.
2. Cut the potatoes into pieces no larger than the first part of your thumb (the one with the nail). (Do not peel. Unless they're russets. Peel russets.) Set aside.
3. Mix olive oil and spices in a large bowl until uniform. Add potatoes and toss to coat.
4. Spread potatoes in a single layer on a baking sheet or in a baking dish.
5. Bake for 25-30 minutes, stirring them around twice so that they will brown but not burn.

Serves three as a side dish.

Generally, if your kitten is smaller than the potato, it is too big.

Tuesday, October 4, 2011

Surprisingly Addictive Brussels Sprout Salad

Don't let the name freak you out. Brussels sprouts once elicited an emphatic ewwwww from me, until I unsuspectingly tried this recipe at my aunt and uncle's one Thanksgiving. This is the recipe-- and it's delicious!

It's the nutmeg, for me, that makes these Brussels sprouts borderline addictive. I like to serve this with roasted butternut squash (cut in half, 400 degree oven for 45 minutes, season with sea salt, fresh black pepper, and 1/2 tablespoon butter each). Sometimes I like to sprinkle it with parmesan cheese, although this would make it decidedly less vegan. Though I've only used this recipe as a side dish, a large portion could pass for a full meal, since it includes vegetable, fruit, and nut components. (By the way, have I mentioned that walnuts are a superfood?) It's light and healthy, yet satisfying. It also only takes about 10 minutes to prep and cook.

1 lb organic Brussels sprouts
2 tbsp extra virgin olive oil
1/2 tsp ground nutmeg
sea salt and freshly ground black pepper, to taste
1/2 cup walnuts, chopped
1/2 cup dried cranberries

1. Shred the Brussels sprouts by thinly slicing.*
2. Heat the olive oil in a large skillet over medium heat. Add the Brussels sprouts, nutmeg, salt, and pepper. Cook, stirring, for 2-3 minutes, until the Brussels sprouts are bright and slightly wilted.
3. Add the walnuts and cranberries, tossing to combine.

Note: The original recipe says to core the Brussels sprouts. Removing the core decreases the bitterness of the sprouts, but it's also wasteful, and when the core is sliced up, most of the bitterness will cook out anyway.

Serves four as a side dish, two as a main course. Original recipe here.

I have captured the sprout.

Wednesday, September 28, 2011

The World's Best Mac and Cheese


You may have heard of the original version of this recipe-- Beecher's "World's Best" Mac and Cheese-- and it truly does live up to its name. In fact, it should be a crime to visit Seattle, WA, and not stop by Beecher's for some fresh mac and cheese and a hunk of their Flagship Cheddar to take home.

This cheesy, cheesy recipe is going to get away with a "healthy alternative" label for a couple of reasons. I don't know anyone who doesn't like macaroni and cheese, and I don't even think I know anyone who doesn't crave it from time to time. So instead of reaching for that blue box of processed, powdered cheese and limp noodles, reach for this recipe. I've switched the flour and the pasta to whole wheat, to add some goodness to the dish, and cut back the amount of cheese a tiny bit, as well. I am a huge cheese enthusiast, and I put at least twice as much on my spaghetti as Tessa does, so trust me when I say that my version is plenty cheesy.

Also, you might consider buying a hunk of cheese and grating it yourself, because apparently shredded cheese has wood in it.

World's Best Mac and Cheese
12 ounces penne pasta
4 cups Beecher's Flagship Sauce (recipe follows)
1/4 teaspoon chipotle chile powder
1. Preheat oven to 350 degrees.
2. Oil or butter a 9-by-13-inch baking dish.
3. Cook the penne 2 minutes less than package directions. (It will finish cooking in the oven.) Drain and set aside.
4. Combine cooked pasta and Flagship Sauce in a big bowl and mix carefully but thoroughly. Scrape the pasta into the prepared baking dish. Sprinkle the top with the chile powder. 
5. Bake, uncovered, for 30 minutes. Let sit for 5 minutes before serving.

Beecher's Flagship Cheese Sauce
(Makes about 4 cups)

1/4 cup ( 1/2 stick) unsalted butter
1/3 cup whole wheat pastry flour
3 cups almond milk
12 ounces semihard cheese, such as Beecher's Flagship, shredded (about 3 1/2 cups)
2 ounces shredded semisoft cheese, such as Beecher's Just Jack
1/2 teaspoon kosher salt
1/4 to 1/2 teaspoon chipotle chile powder
1/8 teaspoon garlic powder

1. Melt the butter in a heavy-bottom saucepan over medium heat and whisk in the flour. Continue whisking and cooking for 2 minutes. 
2. Slowly add the milk, whisking constantly. Cook until the sauce thickens, about 10 minutes, stirring frequently. 
3. Remove from the heat. Add the cheese, salt, chile powder and garlic powder. Stir until the cheese is melted and all ingredients are incorporated, about 3 minutes. Use immediately, or refrigerate for up to three days.

Serves four as a main dish, or eight as a side dish.

Cheeeeeeeeeeeeeeeeeeeeesy.

Tuesday, September 20, 2011

Snack Time


I am a food lover. I also get hungry every two hours. Because of these things, I'm a big fan of snacks. Unfortunately, snacks add up quickly, so I try to find healthy alternatives to my favorite cravings. Here are a few of them.

I primarily crave salty snacks, so those are first, then sweet. I absolutely love hummus. So much so that the previous sentence was probably a huge understatement. My Aunt Judi's homemade hummus recipe follows at the bottom of this entry. Rich in protein and the good kind of fat, I prefer to eat it with baked pita chips or baked organic blue corn tortilla chips, but eating it with carrots, celery, or raw broccoli makes it even better for you.

I also eat a lot of Amy's Organic Medium Salsa on baked organic blue corn tortilla chips. It's fresh, organic, sweet and spicy, and loaded with veggie goodness. Baked chips are also, of course, healthier than their fried counterparts. When Tessa craved queso the other day, I melted 1 tbsp butter, whisked in 3/4 cup almond milk, stirred until it thickened, then added 3/4 cup shredded cheddar and swirled in about 1/4 cup salsa. It was pretty darn good.

A couple other go-to snacks could go either way: a handful or two of almonds, walnuts, or granola. Try combining them, along with some (c)raisins, for a healthy, tasty trail mix. You could also add peanuts, but I'm allergic to those. Then, of course, there's always fresh fruit. Tessa loves dipping organic apple slices in almond butter, cantaloupe chunks or fruit leather. I like my apples whole, along with bing cherries or pineapple chunks.

When I crave something sweet, I try to go for a fruit smoothie or a piece or two of dark chocolate instead of ice cream or cookies. Dark chocolate has more antioxidants than milk chocolate, and I like the taste better anyway. One thing I've been doing lately is breaking a big dark chocolate bar into pieces and keeping them in a tupperware container or plastic bag, so that I'm not tempted to eat the whole thing in one go. If you do want cookies, buy whole wheat baking flour, and consider including healthy ingredients like (c)raisins, walnuts, or oatmeal. Then there's always Tessa's favorite, chocolate avocado pudding.

Aunt Judi's Homemade Hummus

1 1/2 cups dried garbanzo beans, soaked overnight
1 tsp sea salt, divided
3 cloves garlic, peeled
3/4 cup tahini (sesame seed paste)
1/2 cup fresh lemon juice, and more to taste
cayenne pepper
2 tbsp chopped parsley
2 tsp olive oil

1. Rinse the soaked chickpeas well and drain them before putting them in a saucepan and covering them with plenty of fresh water. Bring to a boil. Skim, add one-half teaspoon salt, cover and cook over medium heat, about 1 1/2 hours, until the chickpeas are very soft. (Beware of burning!)
2. Meanwhile, crush the garlic and one-half teaspoon salt in a blender or food processor until pureed. Add the tahini and lemon juice and process until white and contracted. Add 1/2 cup water and process until completely smooth.
3. Drain the chickpeas, but keep their cooking liquid. Add the chickpeas to the sesame paste mixture and process until well-blended. Thin to desired consistency with reserved chickpea cooking liquid. Adjust the seasoning with salt and lemon juice. 
4. Serve, sprinkled with paprika and parsley and drizzled with oil. The hummus can be kept in an airtight container in the fridge for up to a week. Makes about three cups.

Om nom nom.

Tuesday, September 13, 2011

Breakfast Pizza


This recipe is Tessa's. I have to admit, I was a little skeptical. Cracking an egg into a pizza crust on a convex pizza stone didn't seem like the most practical idea. But it turned out alright, and was delicious.

I used Yukon Gold potatoes because Tessa and I love potatoes, and they are one of the most nutritious varieties, along with the Peruvian Purple. I also went whole wheat on the crust, and always use free-range eggs. They always seem to have far superior yolk color.

Next time, I'm going to add in some spinach under the potatoes to amp up the health factor and break up the color monotony, but we didn't have any on hand yesterday. I might also add some fresh goat cheese after baking instead of using cheddar.

1 12-inch whole wheat pizza crust, room temp (they sell them at Whole Foods)
3 large free-range, organic eggs
3-4 small Yukon Gold potatoes
3/4 cup cheddar cheese (enough to cover the top of the pizza)
1/8 tsp garlic powder
sea salt and fresh cracked black pepper
3/4 cup baby spinach (optional)

1. Preheat oven to 375.
2. Place pizza crust on cookie sheet or pizza stone. If adding spinach, spread an even layer across the pizza crust.
3. Thinly slice the potatoes (skin on for more nutrients) and lay a single layer, slightly overlapping, covering the surface of the pizza.
4. Scramble the eggs with salt, pepper, and garlic powder, then carefully pour the egg mixture over the top of the potatoes. (Resist the urge to add a fourth egg. It will expand as it cooks.)
5. Sprinkle the cheddar cheese across the top.
6. Bake for 15 minutes or until cheese begins to brown and visible egg is cooked.

Slice and enjoy. Serves two very hungry people.

It's too early... but it smells like deliciousness.

Tuesday, September 6, 2011

Vegetarian Lasagna


My dad is the oldest of seven, so when his side of the family has reunions, they're quite large. Luckily, his brother Pete makes this killer lasagna that feed lots of people. This is my version of his recipe.

It's vegetarian, and is the basic building block to which you can add ingredients of your choice. For example, if you're a meat eater, you can add a layer of cooked ground turkey, italian sausage, or shredded chicken. If you're a vegetarian, you can add in a layer of eggplant, mushrooms, sliced summer squash, broccoli, etc.

1 jar tomato sauce
1 container part skim ricotta
1 1/2 cups fresh baby spinach, shredded
1 egg
1 cup grated parmesan cheese
1 bag grated mozzarella cheese (at least 12 oz; 16 is better)
1 box oven ready lasagna noodles ("no boil" noodles-- whole grain if you can find them!)
1/2 tsp garlic powder
5-6 leaves fresh basil (optional)
9x13 baking dish
Oven preheated to 375

1. Start by mixing the ricotta and the egg and 3/4 of the parmesan cheese in a bowl. Add the garlic powder, then mix in the spinach and (optional) basil.
2. Spray the baking dish with nonstick spray, then put a few ounces of the sauce in the bottom of the pan, and spread it around. This prevents your lasagna from sticking.
3. Place a layer of lasagna noodles across the bottom. If you need to break one in half, go ahead, the idea is to cover then entire bottom of the pan. Spread some of the ricotta mixture in, then a layer of anything you might be adding (meat or other veggies), then about a third of the sauce and then some mozzarella. Layer some more noodles, and repeat. You should get three total layers.
4. After the last of the noodles are on top, pour any remaining sauce on, and top with mozzarella and parmesan.
5. Cover with aluminum foil and bake for about 45 minutes (55 if using whole grain noodles). Let stand ten minutes after it's out of the oven before serving.
Serves approximately six.

Enough said.

Tuesday, August 30, 2011

Southwestern Pot Chicken

In college, my roommate Mark and I tag-teamed all the cooking for our house. We were always looking for new recipes, and one time, Mark found a recipe for "One Pot Chicken" in a cookbook. The problem was, neither of us wanted to go to the grocery store, so we decided to make the dish with what we had. The result was the bastardized-- but completely delicious-- Pot Chicken. It may not be gourmet, but it's definitely not difficult. We made it once a week or so after its discovery.

For a vegetarian/vegan option, just leave out the chicken (this will only serve two).

4 small chicken breasts
1 can Amy's black bean soup (or refried black beans, or just black beans drained of their liquid)
1/2 cup salsa
2 cups rice, cooked*
1 cup corn
1 bell pepper, diced
1 clove garlic (or 1/4 tsp garlic powder)
ground cayenne pepper, to taste
1 tsp onion powder (or sub in 1/4 cup chopped fresh onion)
1/4 tsp chipotle chili powder
sea salt and fresh cracked black pepper, to taste
cilantro (to garnish)
1 tsp extra virgin olive oil

1. Saute chicken in olive oil in 3 quart saute pan (or similar) with garlic, onion, cayenne, salt, and pepper.
2. When chicken is browned on both sides, add black bean soup, salsa, cooked rice, and veggies. The resulting mixture should have the consistency of a thick stew. If it doesn't, add 1/4 cup water. This will cook out.
3. Cover and simmer for about ten minutes, stirring occasionally, allowing flavors to meld. Taste and adjust seasoning as necessary. Do not let the mixture dry out; add a little water if necessary.
4. Remove from heat and uncover. Sprinkle with cilantro, and serve.

*We used one of those packets of "Mexican" rice at the time, but I recommend whole grain brown rice or quinoa. For quick, delicious rice with healthy options in mind, try one of the Seeds of Change varieties.

Serves three to four.

Oh... so not a flower pot?

Tuesday, August 23, 2011

Quesadillas


My Aunt Judi taught me this recipe last summer. It's pretty quick and easy, and the salsa, avocado, and zucchini give the quesadillas this amazingly fresh, healthy taste while the whole grains and mushrooms keep it filling. Plus, it's super tasty.

The only thing that takes a while is roasting the bell pepper and waiting for it to cool. If you like, you can roast and peel it beforehand and save it in the fridge until you're ready, but it's way better fresh, in my opinion.

If you have a meat lover in your life (like my Uncle Norm) or just want a protein boost, you can throw in some sliced or shredded cooked chicken, but otherwise, this recipe is vegetarian. That's one of the nice things about quesadillas-- pleasing picky eaters is easy, just swap out the fillings.

4 whole grain tortillas
3/4 cup shredded cheese (I like sharp cheddar)
1 zucchini
4 cremini mushrooms
1/4 c fresh salsa
1 orange or red bell pepper
cilantro, fresh or dried
1 cooked chicken breast, seasoned and sliced or shredded (optional)
fresh sliced avocado or guacamole (optional)

1. Cut the pepper in half and remove the stem and seeds. Place on aluminum foil and roast in an oven or toaster oven at 450 for about 30 minutes. Set aside to cool. Once cool, peel off the skin of the pepper and slice the flesh.
2. Meanwhile, remove the stem from the mushrooms and slice the caps and the zucchini (about 1/4 inch thick).
3. Once all veggies are prepped, heat a skillet over medium-high heat on the stove until a drop of water sizzles in the pan.
4. Place a tortilla in the pan and sprinkle half of its surface with cheese. Add zucchini, mushroom, bell pepper, and chicken (if desired) in a single layer on top of the cheese.
5. Drizzle with salsa, sprinkle with cilantro, and then add a second layer of cheese over the top. Carefully fold tortilla closed, and flip to the other side with a spatula. Cook for 30-60 seconds longer, allowing cheese to melt. The tortilla should be golden brown on both sides.
6. Remove quesadilla from pan and slice. Repeat 3 times.
7. Optional: Top with fresh avocado or guacamole.

Serves two.

I want fish in mine!
Happy Birthday, Tessa!

Monday, August 15, 2011

Brontosaurus (Chicken) Burgers


I used to crave nice, meaty hamburgers on a regular basis until Tessa introduced me to the chicken burger at PYT in Philly. I was totally hooked, and when we moved out of reach, chicken burgers (or Brontosaurus burgers-- so named because of the newfound relation between birds and dinosaurs, and, you know, the Flintstones) became her number one dinner request. I found one we both love, originally found here. A friend's boys (age five and seven) also love it. Plus, it's a moist, delicious, healthy alternative to beef patties.

I also tried to find a sauce that came close, and while it's not a perfect match, this simple caramelized onion sauce (which I found here) adds a richness and depth of flavor that really makes this recipe. It's a little time consuming (the sauce, I mean), but it's soooo worth it. Its sweetness balances the (slight) heat from the red pepper and garlic in the burger. It makes around two cups, which leaves a lot of extra to spice up chicken or pasta.

10/12/11 EDIT: I made this recipe tonight with ground turkey instead of chicken, without breading the patty, and, herbed goat cheese in lieu of the caramelized onion sauce, and it was fantastic. This was a nice, quick-fix option, and the turkey patty, though made from a slightly leaner protein, was equally juicy and delicious.


Caramelized Onion Sauce

2 tablespoons extra virgin olive oil
1 tablespoon butter (optional)
4 cups thinly sliced yellow onions
Sea salt and freshly ground black pepper
2 cups chicken stock

1. In a large saute pan or cast iron skillet, over medium heat, add the oil and butter. When the oil is hot, add onions. Season with salt and pepper.
2. Saute until caramelized (approx. 30 minutes), stirring every few minutes to allow browning but prevent burning.
3. When onions are caramelized to your liking, add the stock and bring to a boil. Reduce the heat to medium low and simmer for 10 minutes. Remove from the heat and using a food processor, puree until smooth. Taste, and re-season if necessary. Set aside to cool.

Brontosaurus Burgers

1 lb ground white meat chicken (you can get it at the butcher counter in most grocery stores)
2 cups fresh bread crumbs, divided (toast bread/extra buns, break into chunks, and pulse in food processor)
1/2 cup milk (I use almond milk)
1/4 tsp garlic powder
1/4 tsp cayenne pepper
1/2 tsp sea salt
Fresh cracked black pepper
1 tbsp extra virgin olive oil
Fresh baby spinach
Whole wheat hamburger buns

1. Put chicken in a mixing bowl. Using a rubber spatula, fold in milk, 1/2 cup bread crumbs, garlic, cayenne, salt, and pepper. Warning: the mixture will be very wet which means the patties will be hard to form. Place remaining 1 1/2 cups bread crumbs on a dinner plate or cookie sheet.
2. Divide chicken meat into 5 equal portions, and using your hands, shape into patties. Coat each patty with bread crumbs.
3. Heat olive oil in a large non-stick or cast iron skillet (I use the same one from the onions) over medium heat and "grill" until golden brown and cooked through (3-4 minutes per side).
4. Toast the top and bottom of the hamburger bun in a toaster or oven. Spread caramelized onion sauce on bottom bun, add bronto patty, and spread more sauce on top. Finish it with spinach and the top bun, and enjoy!

Serves five, plus a lot of extra sauce.

Psst... I think I know what I want for dinner!

Monday, August 8, 2011

Chicken in White Wine Reduction


An excellent main course to go alongside that roasted summer squash is this simple, delicious chicken recipe. I usually serve the chicken over a mixture of brown rice and quinoa. Tessa and I have taken to calling this "wine chicken," and it makes the whole house quite fragrant. Although the sauce takes a while to reduce, you don't have to baby it, so put up your feet and have a glass while it does all the work!

2 small chicken breasts
1 tsp extra virgin olive oil
1 cup dry white wine (I use chardonnay)
1/2 cup chicken stock or broth
1/4 tbs garlic or one clove, finely chopped
1 tbsp butter
sea salt and fresh black pepper, to taste
1 cup cooked brown rice, AND
1 cup cooked quinoa, mixed together (alternately, two cups of either grain)

1. Heat olive oil in a large skillet. Sautee the chicken until browned, then set it aside to rest.
2. Deglaze the skillet by adding the wine, then the chicken stock. Season with garlic, salt, and pepper, and allow to reduce over medium-high heat.
3. (optional) In the meantime, shred the chicken using two forks. This will allow the chicken to absorb more of the flavor of the sauce.
4. Once you can slide a spatula across the bottom of the pan and it leaves a "clean" trail behind it, add the butter and return the chicken to the pan for 2-3 minutes. Sauce will still appear thin. (10/23/11 note: My mom told me that when she made this dish, she allowed the sauce to reduce too much, and there wasn't enough to properly sauce the chicken and rice. If this happens, don't worry. Just add a little broth, water, or wine, until there is enough sauce.)
5. Ladle chicken and sauce over mixed rice and quinoa, and serve hot with roasted summer squash or steamed vegetables.

Serves two.

I didn't know wine could be for eating!

Tuesday, August 2, 2011

Roasted Summer Squash


Tessa and I are huge fans of squash, and why not? It's both nutritious and scrumptious. I've tried cooking summer squash several ways, but none come out as delectably as this recipe, modified from one I stumbled across when looking for a new way to cook the crooknecks I'd gotten from our local farmer's market. It was an instant favorite. The squash just melts in your mouth, and it's also quite simple to make. This recipe works well with yellow squash, zucchini, and crookneck, so pick what looks good or mix and match.

2-3 fresh summer squashes
freshly ground black pepper
sea salt
cooking spray

1. Preheat the oven to 425.
2. Trim the stems off the squash. If the squash has a slender neck (as a crookneck does), cut it off and slice it in half. Otherwise, cut the squash from end to end into long slices no more than half an inch thick.
3. Lightly coat a sheet pan or the bottom of a glass casserole dish with cooking spray. Lay the squash slices in the pan. Do not layer.
4. Bake for about 15 minutes, or until the bottoms of the squash have begun to brown. Season with fresh cracked black pepper and sea salt, then turn each piece over. 
5. Continue baking for about 15 more minutes, until the bottoms are browned.

Serves two alongside chicken, pasta, or just about anything.

Mmm... squashy.

Wednesday, July 27, 2011

Easy Veggie Quiche


This recipe spawned from one of my mother's which she calls "A Tale of Two Quiches." My recipe is more like "A Tale of ∞ Quiches," because the possibilities are endless. Personally, I've made this quiche with spinach, broccoli, and cauliflower so far, all of which are packed with nutrients.

Notes: I make this quiche with swiss cheese because it melts without too much fuss or oil-- I tried it once with cheddar and got an excessively moist product. As to the question of whether eggs are healthy or not, my aunt is on the Egg Board, and she touts them as a healthy source of protein, but you can make up your own mind, and opt to use egg beaters or egg whites only.

6 large eggs
1 1/4 cup milk (I use almond milk)
sea salt and fresh ground black pepper
1/8 tsp garlic and onion powder (optional)
2 cups (approx.) vegetable of your choice (spinach, broccoli, and cauliflower work well)
8 oz. shredded swiss cheese
1 9-inch pie crust

1. Preheat oven to 375.
2. Beat eggs and milk vigorously until uniform. Add seasonings.
3. Meanwhile, layer pie crust, vegetable, and cheese in the bottom of a 9" pie pan.
4. Pour egg mixture over the top.
5. Bake for 30-35 minutes or until the egg mixture has set.
6. Allow to cool for at least 5 minutes before serving.

Serves four.

You're going to have to fight me for a slice.

Thursday, July 21, 2011

Fruit Smoothies in a Snap


It's July. Beat the heat: grab your blender/food processor and make a delicious, healthy fruit smoothie in around a minute. Warning: they are addictive. Tessa even requested one for breakfast this morning. However, they are 100% healthy-- fruit, fruit juice, and yogurt.

Tessa is partial to strawberry and raspberry; I'm a fan of strawberry, mango, and strango (see what I did, there?). Use whatever fruit you like-- just freeze it first. Alternately, you can use fresh fruit and around 5 ice cubes. Vegan? Sub in half a banana instead of yogurt for creamy without dairy.

Want an extra boost? Add in half a teaspoon of finely ground flax seed. You can't taste it, and it's a super food.

1 cup frozen fruit of your choice (if using fresh fruit, add 4 ice cubes)
1/2 fresh orange, peel and seeds removed or 1/2 cup fruit juice
1/4 cup low fat yogurt

1. Toss all ingredients in a blender or food processor.
2. Blend until smooth.

BAM! Serves one.

EDIT 10/11/11: In light of this news, I have changed the recipe above to include half an orange instead of 1/2 cup orange juice. I made it today with a Valencia orange, and it was delicious. Alternately, you can use 1/2 cup of another fruit juice; I made it once with apple cider and Tessa loved it.

Ahh... purrrfect.